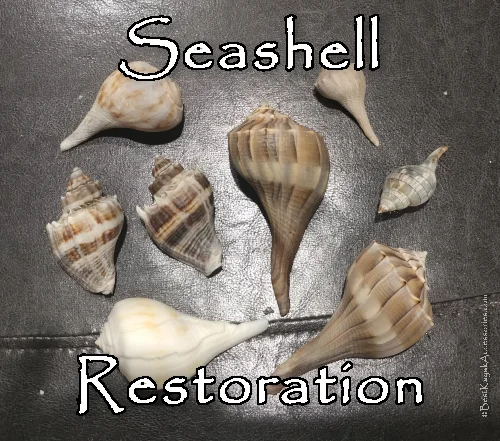
Collecting sea shells is a hobby that many people enjoy, but how do you make the sea shells look their best? We at Best Kayak Accessories will look at a few easy steps that you can restore the color and bring the shine out of your sea shell collection. All you need is some bleach, distilled water, and mineral oil. So grab your supplies, and let’s make those shells look their best with a little seashell restoration!

How Did I Start Collecting Sea Shells?
I started collecting sea shells by accident really. My friend and her brother collect shells, so at the beach, I’d try to find something for them. I didn’t go to the beach much, though, and I didn’t really keep any for myself. That changed when I started kayaking.
I would grab my kayak and paddle out to remote beaches. I started coming across places with lots of shells that weren’t really picked over by other collectors. Of course, I gave a lot to my friends, but I started keeping some for myself.
SeaShell Restoration: The Problem
The problem I came across is that many of these shells sat on the beach for a long time. The sun beat down on them day after day. This seemed to bleach them out or at least fade the shell’s color. The other issue is that shells still in the water often had algae, barnacles, and other things on them that detracted from the shell itself. I always see vibrant shells with interesting coloration. I wanted to restore these colors in my sea shells.
It was a shame that I had some really cool shells that weren’t pristine. I started researching what could be done to make these shells look their best.
Seashell Restoration: The Solution
1.) Soak in Bleach. This is an agreed upon first step in cleaning your seashells, but there’s disagreement on the strength you should use. I mix 4 parts water to 1 part bleach. Soak overnight and rinse in distilled water the next day. I’ve found this gives pretty good results on the shells, but doesn’t leave a strong bleach smell after rinsing.
Bleaching the shells will remove any algae, periostracum, or organic material left in the shell. You can easily remove barnacles after this soak, too. You can use a small knife, screwdriver, or even your fingernail to remove these after soaking.
2.) Allow sea shells to dry. We don’t want water remaining in the shell or any porous section when we do the next step.
3.) Apply a thin layer of mineral oil. Taking a clean rag, I put mineral oil on the rag. Go over the surface of shell with the oily section of the rag. For shells with a shiny, non-porous coating, you won’t need much. Porous shells will take a little more oil to get the best results. Let the oil soak in a for a while (you can’t overdo it). If the shell looks dry, apply more oil. If there is excess oil, you can wipe it off with the rag. You can also use a toothbrush, which can get into the small indentations of the shell.
That’s it! I told you it was easy.
Seashell Restoration: The Results
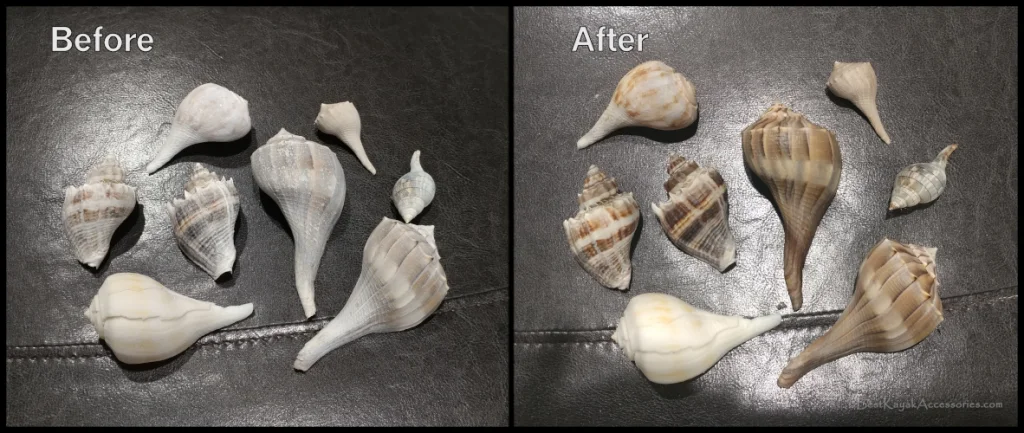
So, is this all worth it? How much of a difference can you really see? It depends on the shell. The mineral oil definitely brings out the colors of the shell. I think it is totally worth it. In fact, I was so happy with the first few shells that I restored, I decided to apply mineral oil to most of my other shells. Here is a before and after picture of some shells that I restored recently.


I took the After picture several days after applying the mineral oil. You can see it takes a lot of the white, chalky layer off, and makes the shell look like it does when it’s wet.
Other Possible Solutions
I have seen a few other tips in shell restoration.
1) Muriatic Acid – A muriatic acid dip (various mixture strengths) is supposed to clean and restore color on the shell, too. I have done this on some shells, and initially I thought it helped. Unfortunately, as the shell dried, it usually still had the white, chalky layer outside. Also, this can damage the shell. The acid seemed to remove the smooth, shiny finish on shells that had that originally. This made them dull and rough. For this reason, I started skipping this step and going right to the mineral oil, and I’ve been much happier.
2) Shellac – I haven’t tried this, but the results look pretty good. Most people seem to use this when a shell will be used in craft projects. It adds a shiny, wet look finish. This seems a little less natural to me than the mineral oil, and the results look very similar.
There you have it! The simple steps to clean and restore the sea shells in your collection. Do you have any before and after pictures of your shells?
I have a pretty big conch, a gift I treasure, that, unfortunately, got some of it’s open, outer, thin layer chipped off, not all but a nice chunk. What can I do to round out the delicate edge to give a more natural look again?
Hi Gretchen,
Conchs are some of our favorites, too. We’ve never tried to smooth out or repair chips in shells. I’d be interested to hear about it if you learn a good process.
Hello! Thanks for the article! Could you please specify which mineral oil you exactly use? There are so many types – for wood, against constipation etc. Many thanks!
Thanks for the message, Kathrin. I’m not sure to be honest. I didn’t realize that there were multiple kinds. I just got it from the medicine/drugstore aisle.
I use the clear school glue. It’s fabulous!
My conch is very bleached. It is dull white with black veins. Can I bring it back to a nice color